
Delightfully Decadent Easy Red Velvet Cake Recipe
Author: Veruska Anconitano, Award-Winning Food Travel Journalist, Sommelier & Outdoor Lover

About the author
Veruska Anconitano
Veruska is a a food travel journalist with awards to her credit, such as World Best Food Travel Journalist. She holds a certification as a sommelier and she is also an ardent lover of the outdoors. Aside from this, Veruska is a Multilingual SEO and Localization Consultant and co-owns multiple websites that cater to a global audience.
Website Linkedin Twitter
Table of contents
- What makes the red velvet cake red?
- Red velvet cream cheese frosting
- What’s the difference with a chocolate cake?
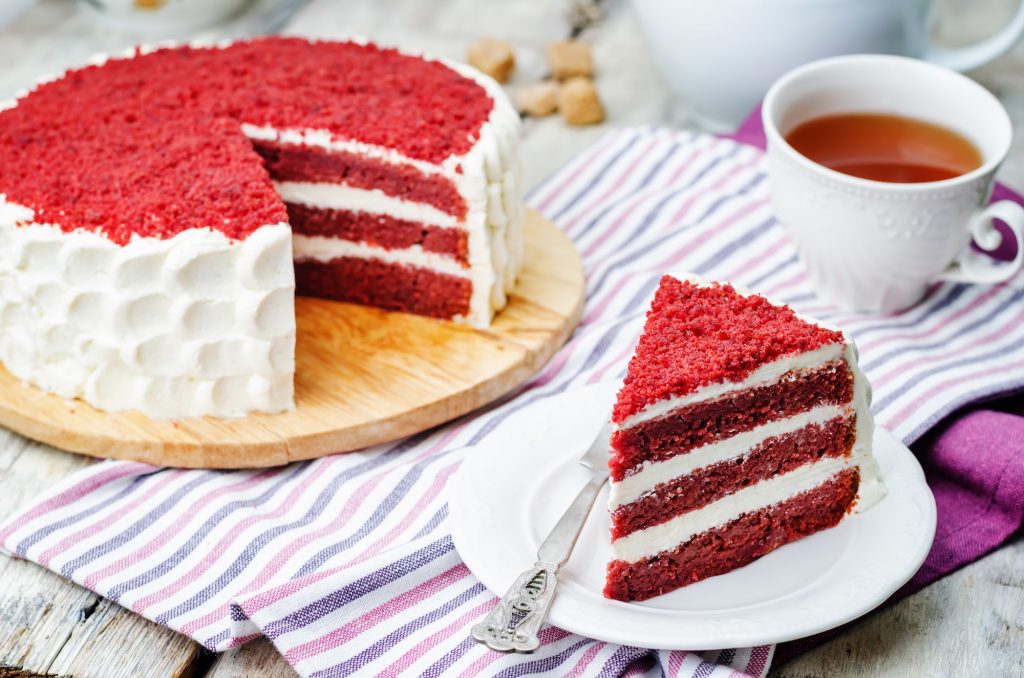
- How to get a perfectly layered red velvet cake?
- Ingredients for a 3 layers Red Velvet Cake [21 cm/ 8 inches]
- Instructions
- notes
- Tips to make the best red velvet cake
- Red Velvet Cake: Frequently Asked Questions with Answers
Red velvet cake is a classic dessert that has been enjoyed by people all over the world for decades. Its unique red color and rich, creamy frosting make it a popular choice for special occasions such as birthdays and holidays.
But what makes red velvet cake so special? The answer lies in its ingredients. Red velvet cake is made with a combination of cocoa powder, vinegar, and buttermilk, which give it its distinctive flavor and moist texture. The red color comes from food coloring, used initially to mask the taste of the cocoa powder.
One of the most iconic features of red velvet cake is its cream cheese frosting. This creamy, tangy topping pairs perfectly with the moist cake, creating a balance of rich and indulgent flavors.
What makes the red velvet cake red?
The red color in red velvet cake comes from food coloring. Initially, the red color was used to mask the flavor of the cocoa powder in the cake. Today, red is mainly used for aesthetics, as it gives the cake a beautiful, vibrant color that is perfect for special occasions such as birthdays and holidays. Some people also believe that the red color of the cake symbolizes love and passion, making it a popular choice for Valentine’s Day celebrations.
Red velvet cream cheese frosting
Red velvet cake is often topped with a creamy and tangy cream cheese frosting. This frosting is made by combining cream cheese, butter, powdered sugar, and vanilla extract and is spread over the sides of the cooled cake. The combination of the moist, rich red velvet cake and the smooth, creamy frosting creates a delicious and indulgent dessert that is perfect for any occasion. The cream cheese frosting also adds a beautiful finishing touch to the red velvet cake, with its smooth and creamy texture and bright white color.
What’s the difference with a chocolate cake?
There are a few critical differences between red velvet cake and chocolate cake:
- Ingredients: Red velvet cake is made with cocoa powder, vinegar, and buttermilk, while the chocolate cake is typically made with cocoa powder, milk, and butter.
- Flavor: Red velvet cake has a distinct, slightly tangy flavor thanks to the vinegar and buttermilk, while chocolate cake has a more traditional chocolate flavor.
- Color: Red velvet cake gets its distinctive red color from food coloring, while the chocolate cake is typically a deep, dark brown color.
- Frosting: Red velvet cake is often topped with a creamy cheese frosting, while the chocolate cake is typically topped with a chocolate frosting or ganache.
Overall, while both cakes are delicious, they have different flavors and ingredients, making them unique in their own way.
How to get a perfectly layered red velvet cake?
To get three equal layers, you can use a higher pan and obtain three bases or put the dough into three baking pans of the same size to churn and stuff them, stacking one on top of the other.
To get a perfectly layered red velvet cake, follow these steps:
- Make sure your cake layers are evenly baked and cooled completely. This will ensure that they are easy to work with and won’t fall apart when you try to layer them.
- Trim the tops of the cake layers to create a flat surface. You can use a serrated knife or a cake leveler to do this.
- Place a small amount of frosting on the center of your cake stand or plate to help hold the first layer.
- Place the first cake layer flat side down on the stand or plate.
- Spread a layer of frosting over the top of the first layer, leaving a small border around the edges.
- Place the second layer of cake on top of the frosting, flat side down.
- Repeat the process until all of the cake layers are stacked and frosted.
- Use a spatula or knife to smooth out the frosting on the sides and top of the cake, creating a nice, even finish.
- Decorate the cake as desired and serve. Enjoy!
Let’s now move to the best ever red velvet cake recipe, our straightforward red velvet cake recipe from scratch.
Ingredients for a 3 layers Red Velvet Cake [21 cm/ 8 inches]
For the layers
- 350 grams of flour (1.5 cups)
- 200 grams of sugar (1 cup)
- 150 grams of butter (2/3 cup)
- 3 large eggs
- 5 tablespoons of natural red coloring (or in my case beetroot extract)
- 250 grams of buttermilk (1 cup/9 ounces)
- 1 teaspoon of apple vinegar
- 1 teaspoon of white vinegar
- 1 teaspoon of baking soda
- 15 grams of bitter cocoa (1/8 cup)
- 1 small spoonful of salt
For the cream cheese frosting
- 450 grams full-fat cream cheese, softened to room temperature (2 cups)
- 100 grams slightly salted butter, softened to room temperature (1/2 cup)
- 480 grams icing sugar (3.2 cups)
- 1 teaspoon vanilla extract
Instructions
- Sift flour, cocoa and salt in a bowl. In another bowl mix butter and sugar until a frothy mixture is obtained;
- Add the eggs one at a time, continuing to mix, then add the buttermilk and the food coloring or the beetroot extract;
- Combine the two mixes, stirring everything from bottom to top so that the buttery mixture won't lose its foaminess;
- Pour the baking soda into a glass bowl, add the white and the apple vinegar and beat well then add quickly to the mixture, stirring constantly to mix;
- Bake for 40 minutes in an oven already hot, inside a buttered pan, and cook at 170°C. Remove from the oven and cool.
- Prepare the frosting by whisking all the ingredients together;
- Once the cake has cooled completely cut it horizontally into three parts and fill with the cream between one layer and another without overdoing. With the remaining cream cover the outside of the cake leveling with a spatula.
- Put to rest at room temperature then keep refrigerated for at least 15 minutes before serving.
notes
Preparation time: 3 hours
Cooking time: 1 hour
Total time: 4 hours
Tips to make the best red velvet cake
- Following the above doses, you will get a cake of 18 cm in diameter if using the method of the three baking sheets or 21-22 cm using a single baking sheet and then cutting the cake once cooked;
- Do not overmix: the key to getting a perfect Red Velvet Cake is to give all the ingredients air so that they will raise while cooking;
- If you bake layers of different sizes, you can decide their size once cooked using a knife to get the desired shape/size. You can crumble the remaining cake on top of the cake;
- Let the cakes cool completely before frosting and decorating. This will make it easier to work with the cakes and create a more professional-looking finished product;
- Once ready, place the cake in the fridge and remember to remove it at least 15 minutes before serving it so that it is not too cold;
- Do not leave the cake out of the refrigerator for a long time, or the cream will soften too much and may become sour;
- Use the remaining cooked mix to cover the surface of the cake by crumbling it. You will get an original yet more beautiful Red Velvet;
- Once prepared, the original Red Velvet keeps well for 5 days in the refrigerator, covering it to prevent the cheese from assimilating the odors of the other products.
Red Velvet Cake: Frequently Asked Questions with Answers
Can I use natural food coloring instead of artificial coloring in red velvet cake?
It is possible to use natural food coloring instead of artificial coloring in red velvet cake. Still, it may not give you the same vibrant red color that you would get with artificial food coloring. Natural food coloring is made from plant-based ingredients and tends to be more muted and less vibrant than artificial food coloring.
You can use beet juice or red fruit juices such as cranberry or raspberry if you want natural food coloring in your red velvet cake. These will give the cake a reddish hue, but it may not be as bright as you would get with artificial food coloring.
Alternatively, you can try combining natural and artificial food coloring to achieve the desired shade of red. Experiment with different ratios of natural and artificial coloring until you find the perfect balance for your red velvet cake.
Can I make red velvet cupcakes instead of a cake?
You can make red velvet cupcakes instead of a cake. The process is very similar to making a red velvet cake, but the baking time will be shorter, and you will need to fill the cupcake liners with a smaller amount of batter.
To make red velvet cupcakes, follow the same recipe as you would for a red velvet cake, but be sure to adjust the baking time. Most red velvet cupcakes will take around 15-20 minutes to bake, depending on the size of the cupcakes.
You can also use the same cream cheese frosting recipe to top your red velvet cupcakes or a different frosting, such as chocolate ganache or vanilla buttercream.
Can I freeze my red velvet cake?
You can freeze red velvet cake to extend its shelf life and enjoy it at a later date. To freeze red velvet cake, follow these steps:
- Make sure the cake is completely cool before freezing.
- Wrap the cake tightly in plastic wrap, making sure to cover the entire surface of the cake.
- Place the wrapped cake in an airtight container or freezer bag and label it with the date.
- Store the cake in the freezer for up to 3 months.
To thaw the cake, remove it from the freezer and let it thaw in the refrigerator for several hours or overnight. You can also thaw the cake at room temperature, which may take longer and result in a less tender cake.
It’s important to note that the frosting on a frozen red velvet cake may become slightly softer after thawing. If you want to maintain the texture of the frosting, you may want to hold off on frosting the cake until it has been fully thawed.
How long does red velvet cake last?
Red velvet cake will typically last 3-5 days when stored in the refrigerator. To keep the cake fresh, wrap it tightly in plastic wrap or store it in an airtight container to prevent it from drying.
What are some creative ways to decorate red velvet cakes?
Depending on your style and preferences, there are many creative ways to decorate a red velvet cake. Here are a few ideas:
- Use a piping bag and various tips to create beautiful and intricate designs on the top and sides of the cake.
- Top the cake with fresh fruit, such as strawberries or raspberries, for a pop of color and flavor.
- Crush up some cookies or candy and sprinkle them over the top of the frosting for a fun and tasty garnish.
- Add some edible flowers or leaves to the top of the cake for a natural and elegant touch.
- Using powdered sugar or cocoa powder, use a stencil or cut-out shapes to create a pattern or design on the top of the cake.
- Add some chocolate shavings or curls to the top of the cake for a sophisticated and elegant look.
- Use small candies or sprinkles to create a colorful and fun design on the top and sides of the cake.
Overall, the sky’s the limit when decorating red velvet cake.
If you love this...
Social
keep reading

55 Pumpkin Recipes to Make this Fall 2024

53 Easy Ketogenic Diet Recipes Ideas

Vanilla Cake Recipe Easy from Scratch

Easy and Traditional Pound Cake Recipe from Scratch

Easy Carrot Cake Recipe from Scratch

The Best Non-Toxic Non-Stick Pans of 2024 for Every Budget
